I Want to Add a Read More Button in My Text in Elementor
Imagine you have a website for your walk-in business concern, say a pocket-sized sandwich shop. You lot are closed on Saturdays and Sundays. Y'all tin have someone update the website each Friday evening to evidence a bulletin nearly beingness airtight so once again on Monday morning to change it dorsum to show you are open. That would be a lot of work and people might forget. Some other option would be to employ a conditional display option that only showed the message well-nigh being closed on Saturdays and Sundays. Sounds a lot simpler.
In that location are a lot of potential use cases for a conditional brandish feature. Perhaps you lot want to show a holiday notice, share a bulletin with logged in users, or personalize a page for more engagement. In this tutorial I want to wait at the Dynamic Visibility extension that is part of the Dynamic Content for Elementor (DCE) addon. Sometimes y'all may want to show or hide content on a page co-ordinate to a special condition. DCE provides a large number of options for showing or hiding a section or widget on the page and has a big number of condition types to choose from.
Video Version
Setup
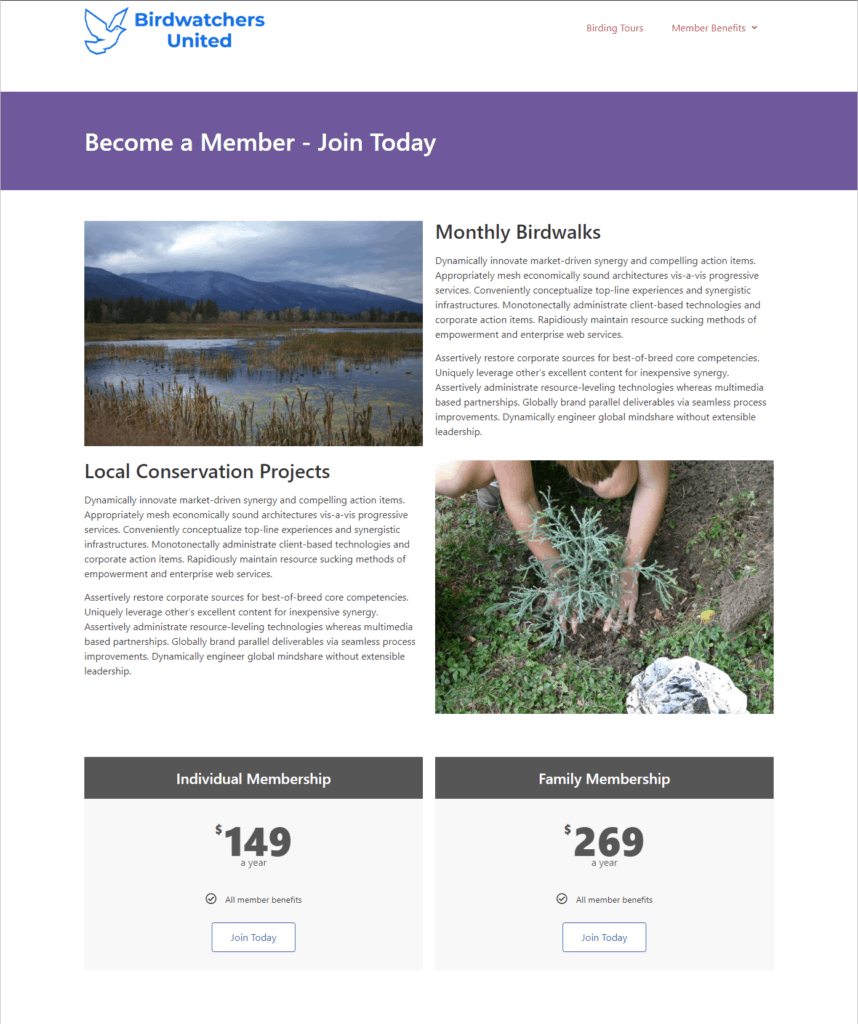
I accept a demo site created for a fictitious bird watching order. On their sign up page they take a section telling the benefits of joining and a pricing grid.
Add a Promotion But Keep It Subconscious
Dynamic Content for Elementor has a feature where you can set a widget or section to be subconscious on the forepart-finish. This is a blanket setting that is on or off and it allows y'all to work in the Elementor editor and continue that office hidden until you are ready to employ it.
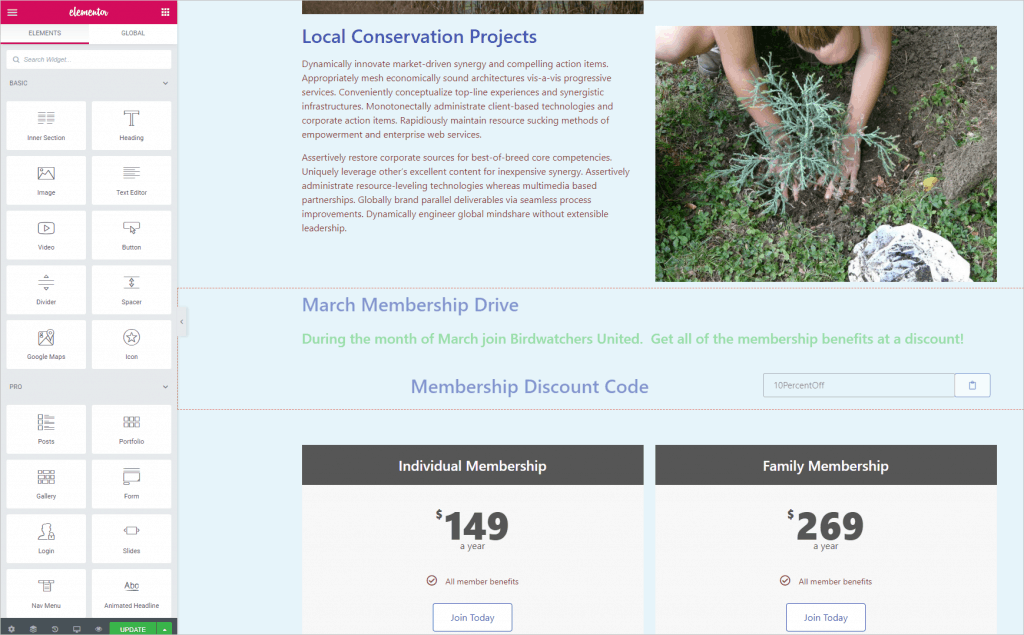
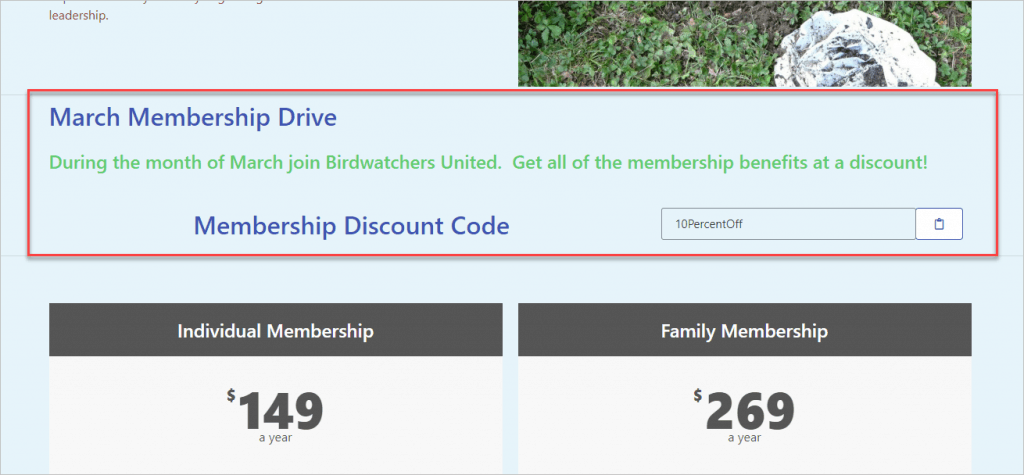
Hither is the folio in the Elementor editor. Note that in that location is a section for the March Membership Drive, just it is non showing on the front-end. That lite red line shows that there is some provisional display option practical.
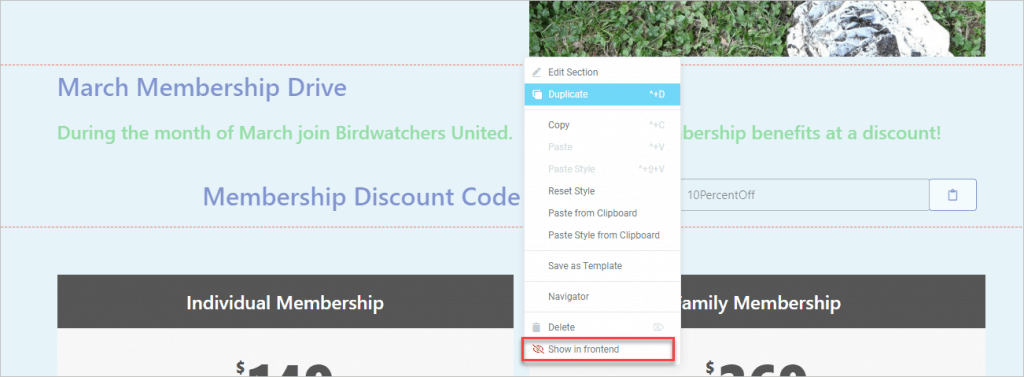
The promotion section has been hidden from brandish using the DCE display toggle. Right click on the section to testify or hide it on the front end. This is a simple toggle with no options that allows us to piece of work on the section but keep it hidden until we are set to prove it.
High Level Display Settings
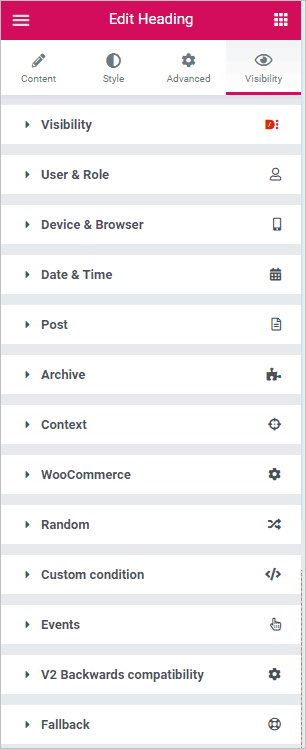
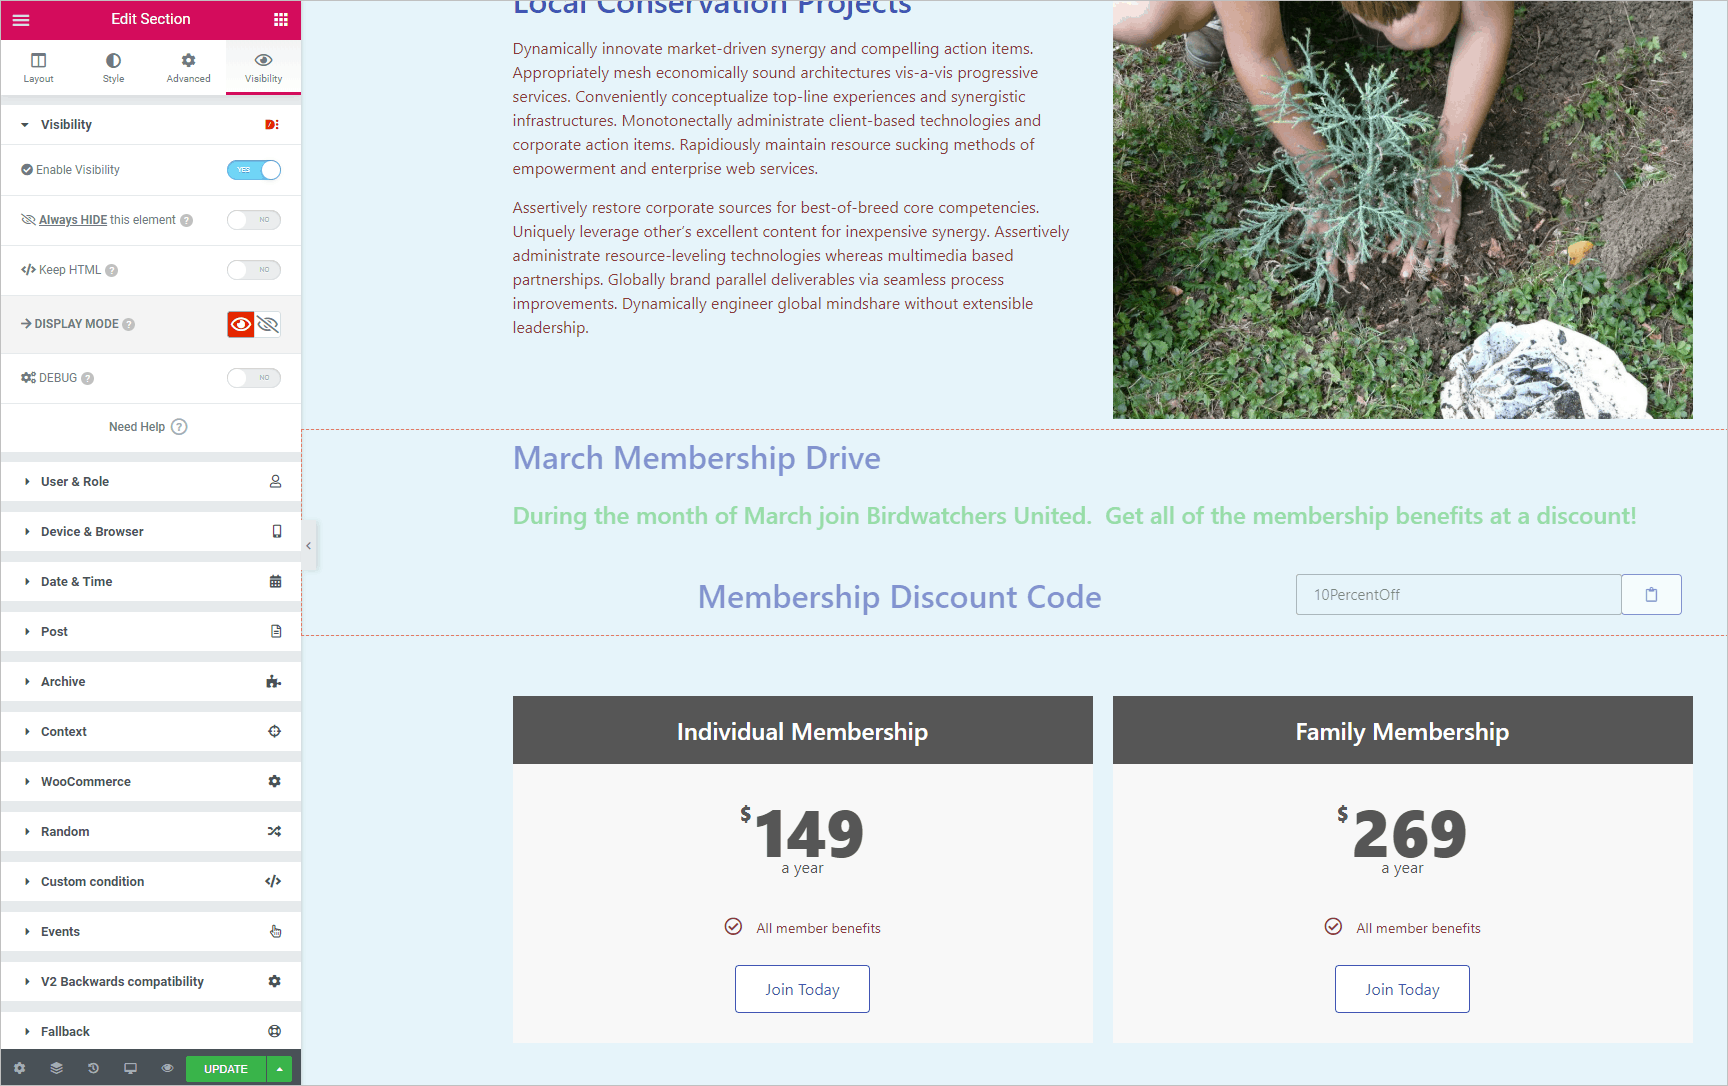
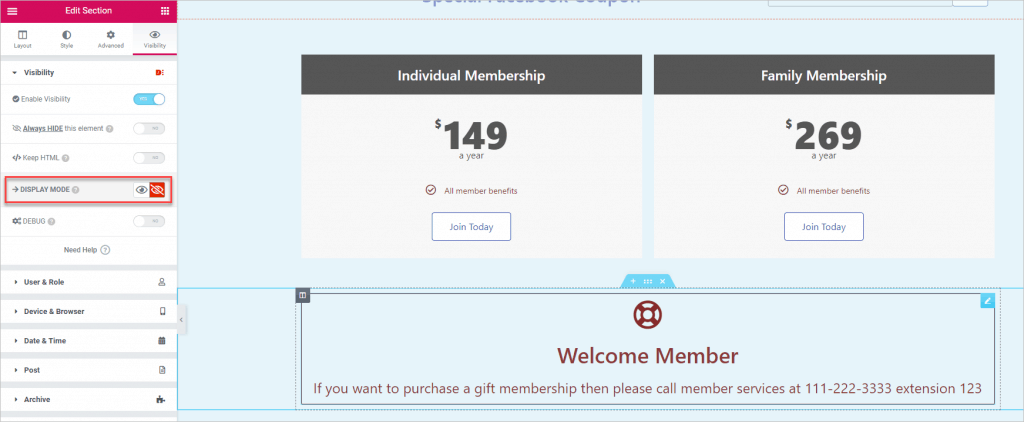
Dynamic Content for Elementor adds a "Visibility" tab to the Elementor editor. At the top are the loftier level Visibility settings and at the lesser are the Fallback settings. In betwixt are the unlike types of display weather that Dynamic Content offers. As you meet, there is a big list.
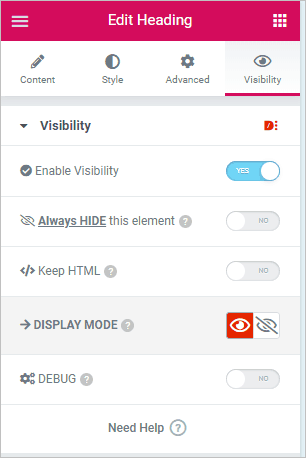
Opening the top Visibility accordion shows the high level settings. If you are going to utilize whatever of the other brandish conditions then yous demand to toggle on the "Enable Visibility" option. Nether that is the "Always Hibernate" toggle. This is the same equally the correct click option shown to a higher place that is attainable from the elements context card. The "Keep HTML" option is used when you lot want to trigger a hidden div on the page, for example, when a push button is clicked.
The "Display Mode" option is important: The "heart" is used when you want your condition to show the element when the condition is met and the crossed out eye icon is for when you lot want your condition to hide the element when the condition is met. There is also a "Debug" toggle that gives yous a bit of information about which conditions are enabled. The "Need Help" link takes you to the Dynamic Content for Elementor documentation pages for the Visibility features.
Show the Section During a Date Range
The section promoting the membership drive has a discount coupon created using the DCE Re-create to Clipboard widget. There is a tutorial showing how the DCE Re-create to Clipboard widget works. Let's set this section to bear witness during the month of March.

When we toggle on the DCE Visibility extension we go a lot of options for decision-making the display. These include User and Role, Device and Browser, Date and Time, Post, Archive, Context, WooCommerce, Random, Custom Conditions, Events, V2 Backwards Compatibility, and Fallback.
V2 Backwards Compatibility is if y'all had set display conditions using an older version of the plugin and we don't need that.
Fallback is for showing a default when the section is hidden. You tin can accept a text message as a fallback, or you can use a pre-saved template. Since I am going to be using multiple conditions, I won't need a fallback.
Appointment Range Option
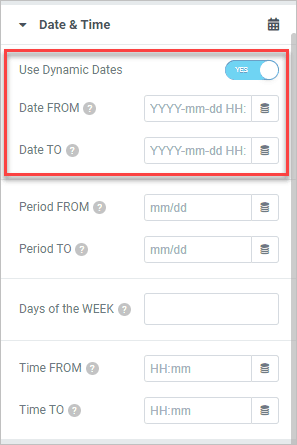
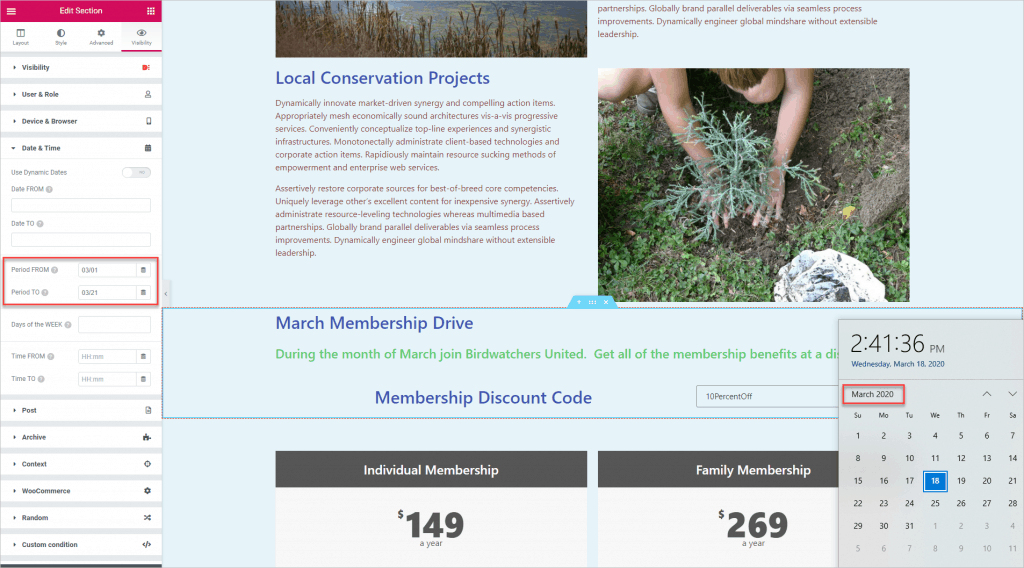
At that place are several ways y'all can use the Date & Fourth dimension options. Note at the top there is a toggle for using dynamic dates. This gives you lot the option to apply date time fields.
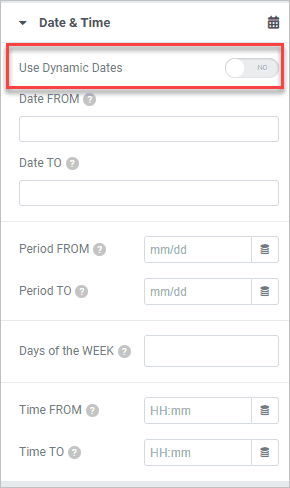
When we toggle that on nosotros see two more entry boxes that accept data time values. Nether that are the entry boxes for a "Period" of dates. Then in that location is a Days of the Week option. That gives you the pick to add any of the days of the calendar week you need. Lastly there are entry boxes for times. Note that all but the Days of Week options can be pulled from the database using the dynamic tags icons to the right of the entry boxes.
Let's starting time by setting the date for showing the department during March. I added a engagement range using the Period boxes and you can see in the lower correct corner that the screenshot was taken during March.
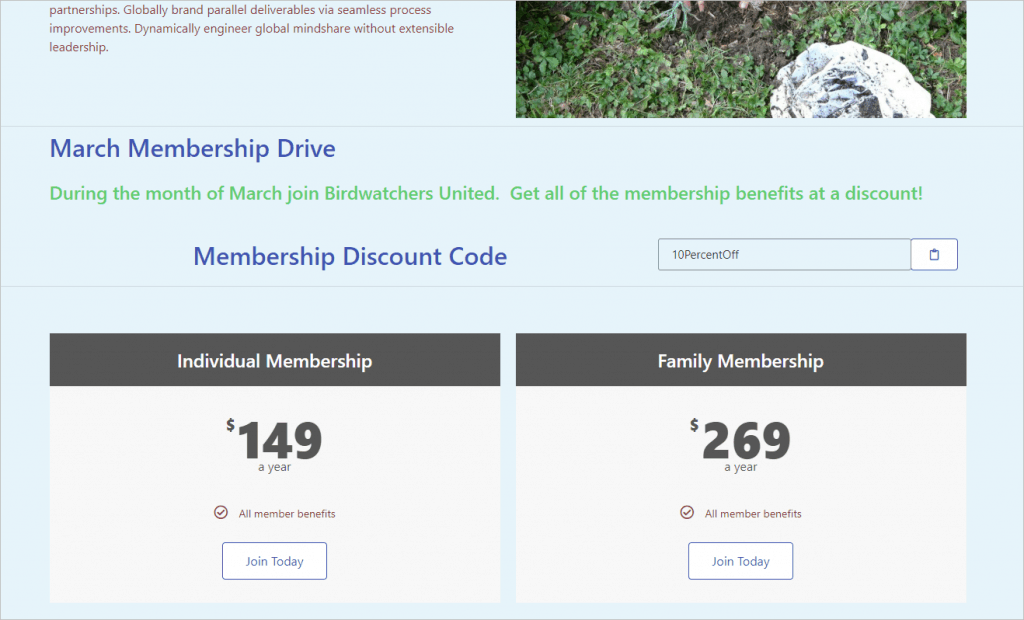
And on the front-terminate it now shows. That was easy. Now if we forget on the starting time day of April to update the site information technology will still exist OK as the special section won't bear witness anymore.
Show a Different Coupon if the Company is From Facebook – Context Option
The bird watching club has a group on Facebook and have offered Facebook group members a twenty% off coupon. And so the next stride is to hide the regular 10% off coupon if the visitor to the folio is coming from Facebook and show a different twenty% off coupon instead. On Facebook in that location is a link to the membership page that has at the end of the URL "&facebook=true". For case,
https://birdwatchersunited.com/go-a-member/?facebook=true Now nosotros can set up the page to respond to that link variable. Annotation that with DCE if any condition matches then the section will testify, then commencement I removed the appointment range condition entered for the previous case. We will do this using the "Context" display conditions.
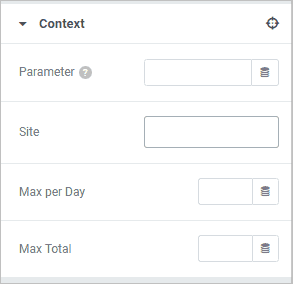
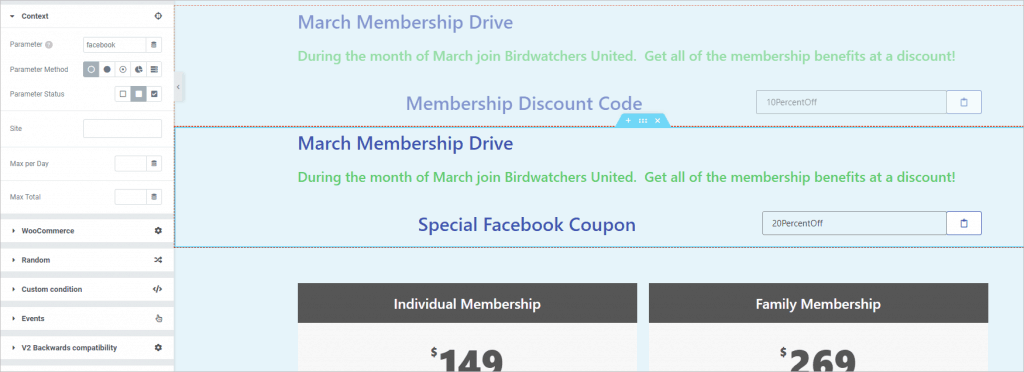
In the "Parameter" entry box at the top you can type in the name of your parameter. Y'all could also select a parameter using the dynamic tags icon. If y'all use the dynamic tags then the full fix of Dynamic Content for Elementor dynamic tags are available. Adjacent is the "Site" entry box. This actually gives y'all a drop downward list of some site variables you could use. Below that are two options to limit the number of times the element volition show either per day or in full.
Earlier we add together a new department with the coupon code for Facebook members, lets set the existing section to hide if the facebook parameter is plant on the URL. Right click on it and go to the Dynamic Display options and go to the "Context" accordion.
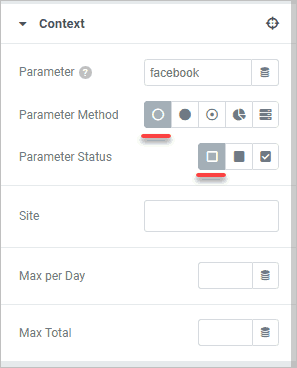
In the Parameter text box I entered "facebook". When y'all type in a value the Parameter Method and Parameter Condition options bear witness. For Parameter Method, I selected the offset push with is for Get parameters. The other Parameter Method options are POST, REQUEST, COOKIE, and SERVER.
The 3 buttons for Parameter Status are, from left to right, "Not isset", "Isset", and "Defined value". If you utilize "Defined value" and then some other entry box shows where you can type that value in. For Parameter Status I selected the first push for "Non isset". And so, if the facebook parameter is not found on the URL then the section will show, simply if the facebook parameter is present then information technology will not.
I saved and tested this on the front and the default coupon box shows.
At present I add together another section with the Facebook coupon. I ready the Context condition equally before, except that for the Parameter Condition I selected the 2nd push button which is for "Isset". So, the section with the Facebook coupon will testify if there is a parameter on the URL with "facebook," otherwise it will not show.
I saved and tested this. With this URL from my local testing site, that doesn't have a facebook parameter, I see the default box.
https://juste.local/become-a-member/ 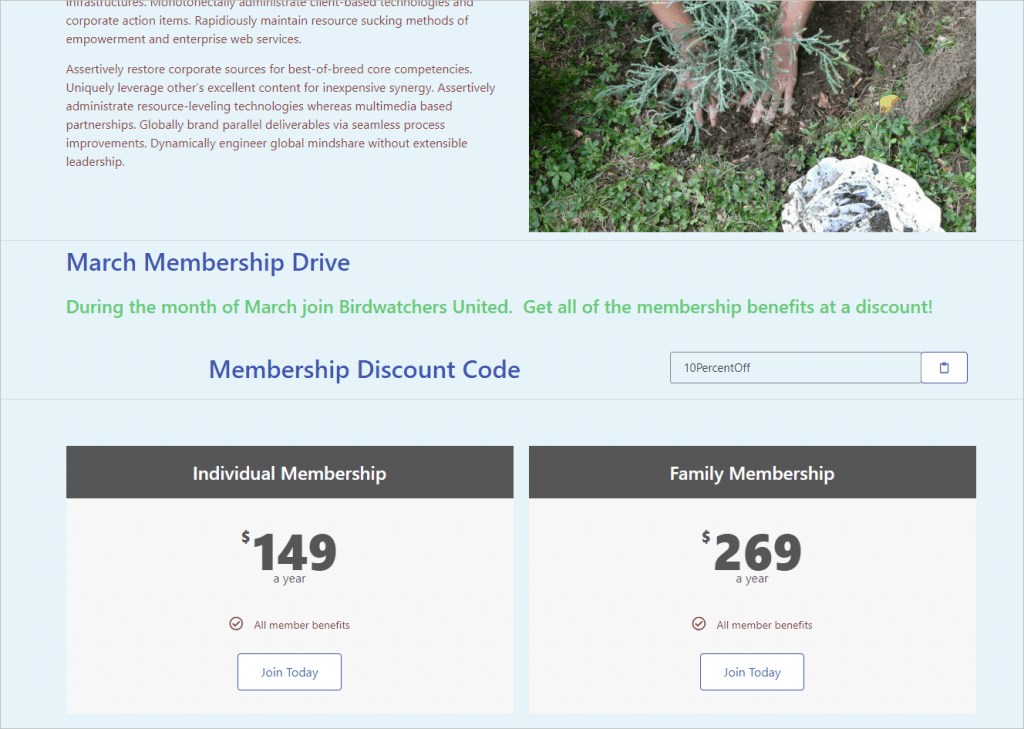
And at present with the "facebook" parameter on the URL the regular coupon is hidden and the Facebook coupon is shown.
https://juste.local/get-a-member/?facebook=true 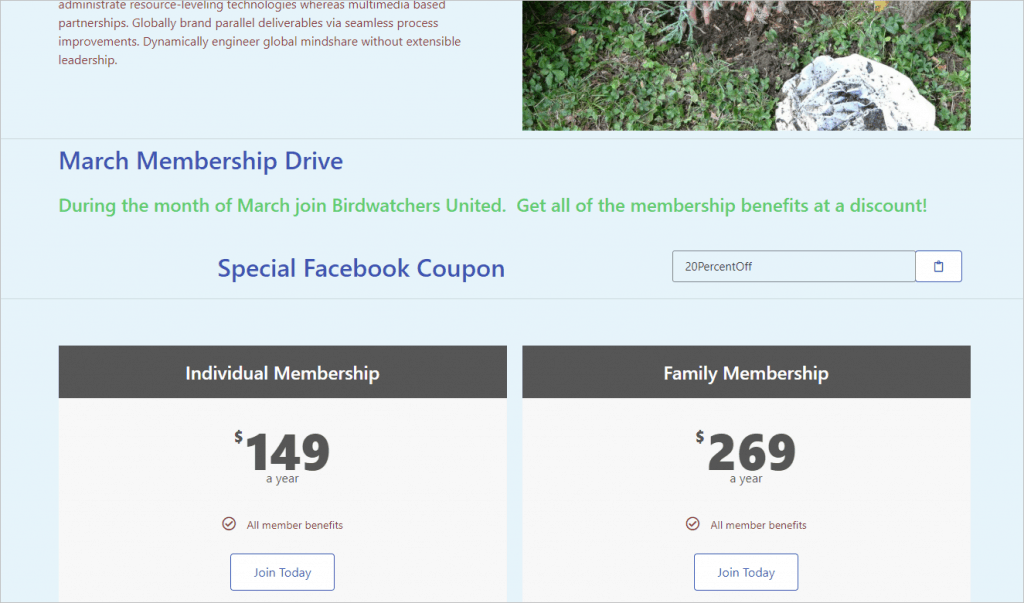
Some other option for setting conditions by URL might be the Referrer display condition mentioned below. My understanding is that Facebook does a pretty practiced task of including the referrer value, simply if y'all have it ready to open in a new tab using WordPress then the "noreferrer" tag is automatically added to the link.
Prove a Message if the User is Logged In
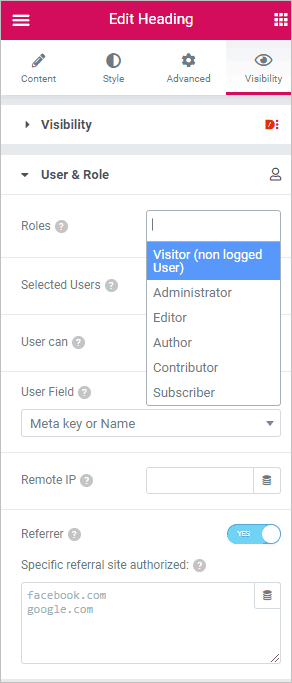
1 of the brandish status categories is for "User & Role". At the top you tin choice from the roles defined for the site.
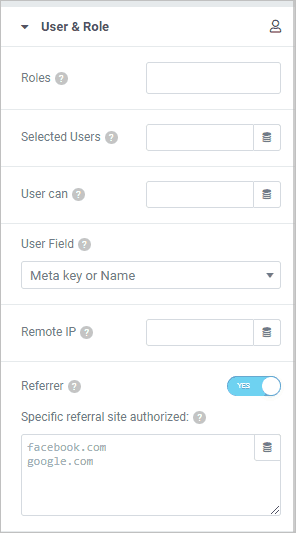
Obviously the user will demand to exist logged in or you can pick the Visitor (non logged in) option.
You tin can also set rules by "Selected Users", User capacities ("User Tin can"), a field from the user's profile ("User Field"), the visitor's Remote IP or the Referrer. I toggled on Referrer so you can run into that it is a list box with one domain per line.
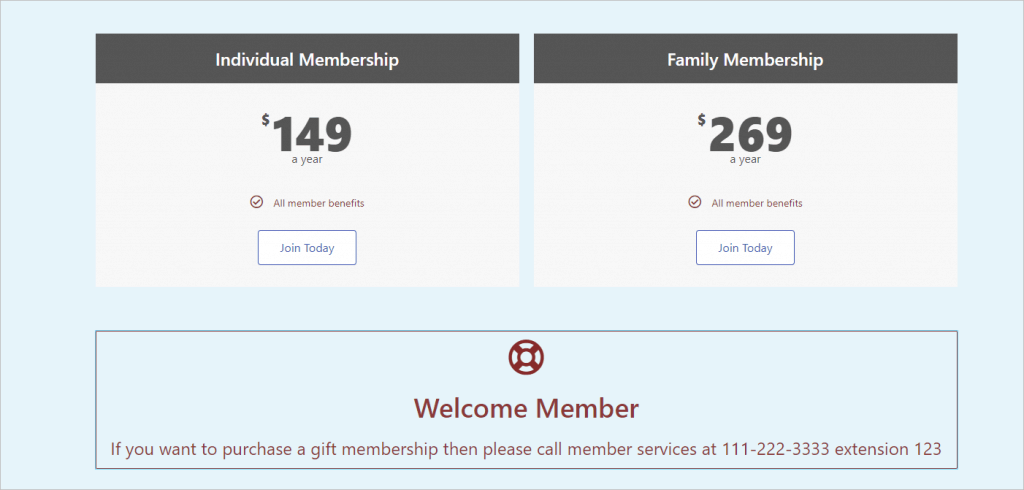
This is a membership site and if the user is logged in and so they are already a member. So, we will show an alert bulletin if they are logged in that won't be seen by visitors who are not logged in.
First I went into the Brandish Mode and set information technology to hide if the status is met.
Then I went to the User & Role set of conditions and selected the "Visitor (not logged in)" option.
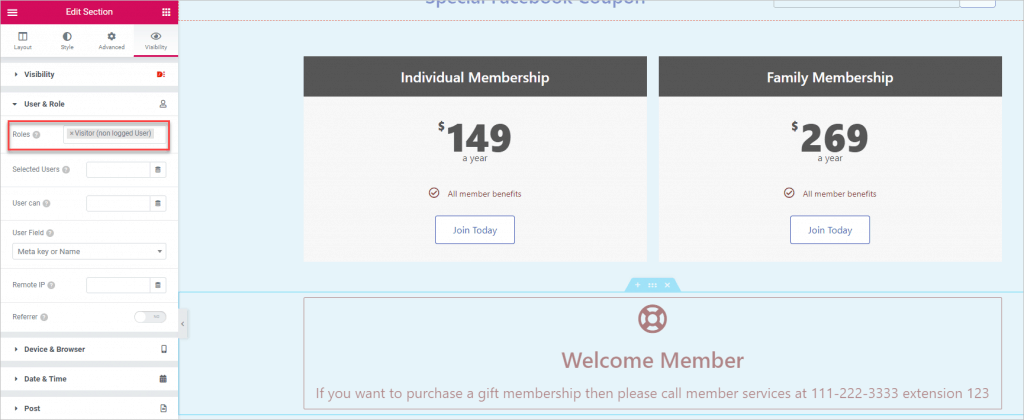
The condition worked as expected. Logged in users saw the member message and visitors who were not logged in did non.
Other Brandish Status Categories
I've shown examples for User & Role, Engagement & Time, and Context. There are a bunch of boosted categories and these each accept a few means they can exist used.
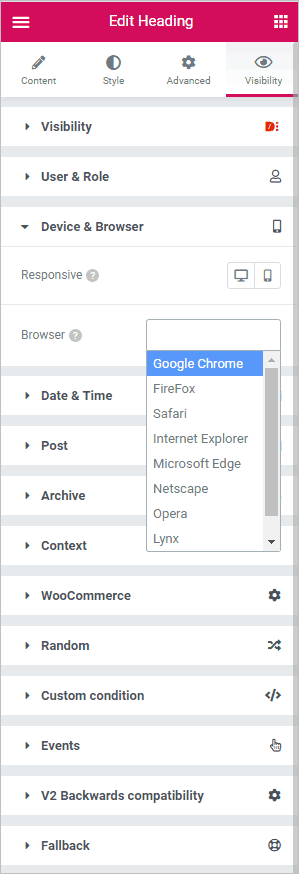
Device & Browser Conditions
DCE has brandish conditions based on the visitor'south device size and web browser. For example, if you don't support Internet Explorer so you can show a banner urging visitors to upgrade.
Post-based Conditions
There are a big number of Post-based display conditions. You tin can ready weather based on a particular Postal service ID, past post type, and by post title. If yous select taxonomy and then you lot have an choice to pick the taxonomy and terms. In that location are options to base provisional display on a field's value, on the post format, and on a page and its identify in a page bureaucracy.

Annal Conditions
You can set a display condition based on the archive type. For example, for the author archive you could bear witness an author box.

WooCommerce
There are WooCommerce related conditions. I didn't have WooCommerce installed, and so they did not show.
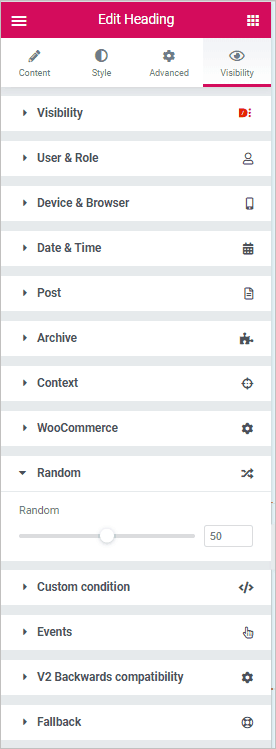
Random
Y'all can show or hide elements based on a random percentage. Then, for example, if you wanted to bear witness something one-half of the time you lot would set it on 50, for 50%.
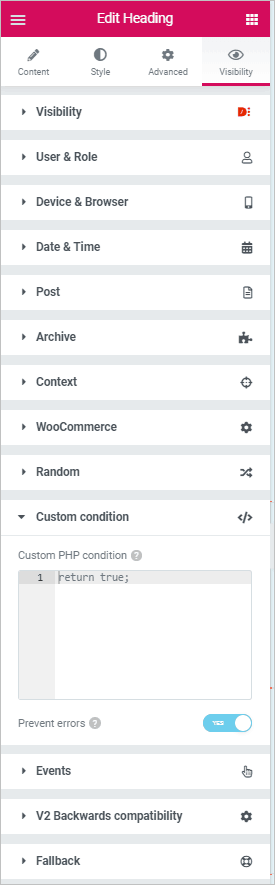
Custom PHP Status
You can write your own status using PHP as long as information technology returns either true or fake. You can use all WordPress variables and functions.
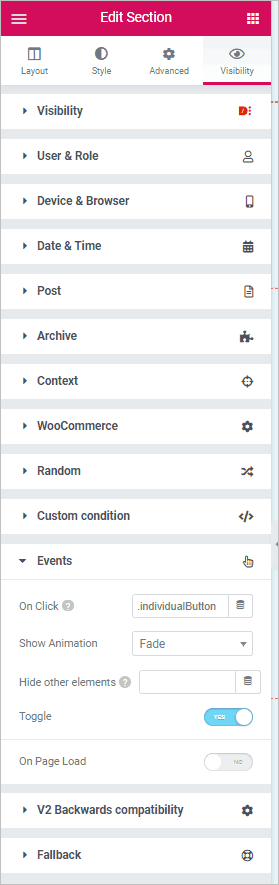
Consequence Atmospheric condition
Finally, you can gear up conditions based on page events. For example, if a button is clicked. You would do this past assigning the button a CSS course or ID and so prove or hide the chemical element when it was clicked. Note that you need to toggle "Keep HTML" in the main display conditions at the top. Hither nosotros assigned a CSS grade in the Advanced tab for the button chemical element.

Then in the Event On Click box you would add the class or id assigned to the push button. The "Toggle" toggle means that if the element is hidden it will be shown, and vise-versa.
Conclusion
In this tutorial nosotros have looked at the condition brandish options of the Dynamic Content for Elementor addon. We take looked at several examples likewise every bit an overview of the full list. In many cases the options are pretty straightforward and like shooting fish in a barrel to figure out. There are a few where documentation assistance is needed. I constitute that the documentation on the DCE website is improving, simply in that location are still some gaps.
The provisional display features would be useful for marketing personalization when, for example, someone signs upwards for your email listing and you pass their proper noun on the URL to the give thanks you page. Dynamic Content for Elementor would brand information technology easy to customize the give thanks you bulletin. Similarly, these display options are aureate for membership sites where yous may want evidence or hide content based on a membership condition.
There are a few plugins in the WordPress plugin directory that add conditional display options for Elementor. There are likewise a couple of Elementor addon packs that add together display weather. All the same, it is off-white to say that Dynamic Content for Elementor's options are ii, three, or more times more all-encompassing than any other Elementor solution available. The range of display options is very extensive and reflects the developers' thorough knowledge of WordPress. Dynamic display atmospheric condition are a very strong part of the Dynamic Content for Elementor suite of features and most everyone would find them useful.
Visit the Dynamic Content for Elementor Website
Source: https://e360.co/conditional-display-using-dynamic-content-for-elementor/
0 Response to "I Want to Add a Read More Button in My Text in Elementor"
Post a Comment